Pages

Wednesday 17 October 2012

Liven Up A Photo

Sometimes you can take an image on a camera phone, and it looks perfectly alright on the screen, but you look at it on your PC and suddenly you notice it's a bit flat. It's easy enough to 'pep up' a slightly faded looking image, and I've done it here in just three steps.

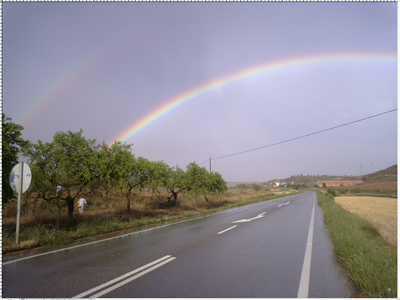
I took this image of the sun rising over the field I pass on my way to work. It's nice, and the one advantage of the shorter days is I'm actually up in time to see sunrise.


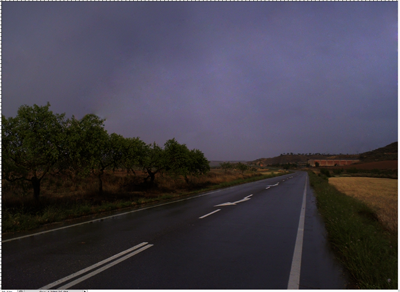
Still, things could be improved. A couple of colour balance layers bring out the blue in the sky, and put the green back into the frost-encrusted grass.


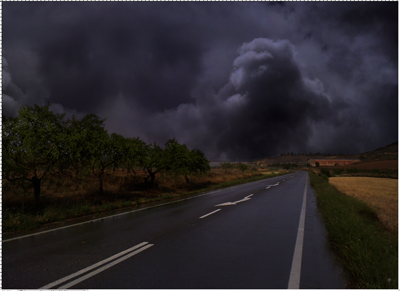
I like that lens flare that the camera naturally introduced, but a tad more won't go amiss.


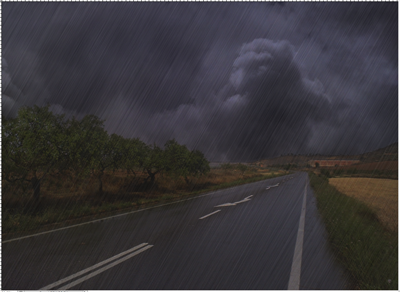
And finally, a vignette to drive the eye inward.


Yes, Instagram can do all these fancy things to your images, but instead of automated filters, isn't it nice to just do it yourself?

Wednesday 10 October 2012

Changing the Weather

Following on from the digital rain tutorial that I posted last week, I thought I'd share a short process for how I drastically altered a stock image.

I started off with an image of a road and a rainbow from Sxc.hu.


Then I removed the rainbow, cloned out the people on the left hand side, cropped the image to remove the sign to the left, and darkened the whole image using both Levels and the Brightness/Contrast function as adjustment layers.


Next I added storm clouds from another stock image, this time on a new layer set to 'Multiply'.


Then I added my first layer of digital rain.


And another, this time set to 'Multiply.


And finally, a dark vignette around the edges!


Wednesday 3 October 2012

#Tutorial - Digital Rain

Every now and then, it's nice to be able to change the weather. Sometimes taking photos of rain doesn't quite work, so in this tutorial, I'll show you how to add artificial rain to an image. This will either boost any existing rain, or change the weather altogether! I'm going to use this photo I took on the North York Moors.


Now, duplicate the layer (Ctrl / Cmd + J). Go to Filter > Add Noise. Choose Uniform and Monochromatic, and a fairly high number.


Now go to Filter > Blur > Motion Blur. I've chosen an angle of 60o, but you might want to have the rain slanting in a different direction. Experiment with the amount until you get something similar to this.


You'll have an odd border where the blur has faded out, so hit Ctrl/Cmd and T to bring up the Free Transform option. Drag the blurred section so the border is beyond the edge of the image. Hit Enter to accept the change.


Now you'll need to alter the opacity, or change the blend mode, to make it look like rain. I have mine set on Vivid Light at 99%. Voila! Digital rain!


If you've had a go, post your result in the comments so I can have a look!