Pages

Tuesday 28 May 2013

Achieving the Toy Camera look (1 of 2)

I got a Canon Powershot A810 for my birthday this year, and I've been experimenting with the image modes that it ships with. Normally I would shoot everything on P mode and make my edits in Photoshop - you might wonder why, since you can often achieve good effects with the modes, but the problem is, if you use the mode, there's no way of recovering the image without the edits applied by the camera. Applying the edits in Photoshop allows for greater flexibility. However, I'm particularly taken with the 'Toy camera' mode, which seeks to emulate the plastic toy cameras that have become all the rage in photography circles of late. This is an image of a steam engine on the Tanfield Railway that I took with the mode.


I really like it, but at the same time, I still prefer to take images in P mode and edit them later. So in this post, and the next, I'm going to show two ways of 'faking' the toy camera look in Photoshop.

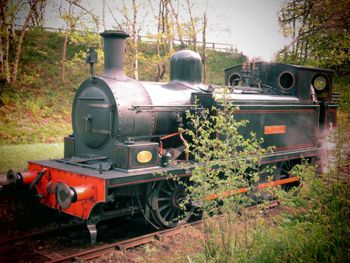
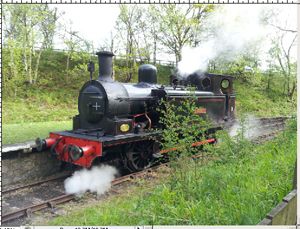
First, I've opened my image. You can see that it's a fairly flat and lacklustre image, as most digital photos are when they're straight from the camera.


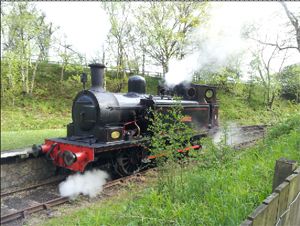
Next, I've cropped the image to easily centre the engine. I usually divide the width by the height of the image to get the ratio, to ensure that any cropping preserves the proportions of the image. For this camera, the ratio is 1.33.


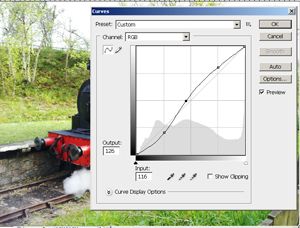
Now, I've added a Curves image adjustment layer to boost the contrast. An easy way to do this is to create an S curve by moving curve up at the top right point, and down at the bottom left point.


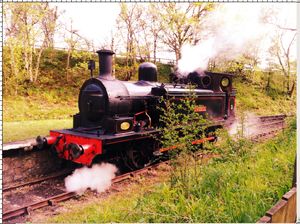
Next, I added another Curves adjustment layer, but in this case, I changed the channel using the dropdown box. I added curves for the Red, Green and Blue channels to give the image that red cast.


Finally, I added a dark brown layer over the top, set the blending mode to 'Multiply', lowered the opacity, and used a layer mask to paint out the centre. This gives the vignette look so common to toy cameras.


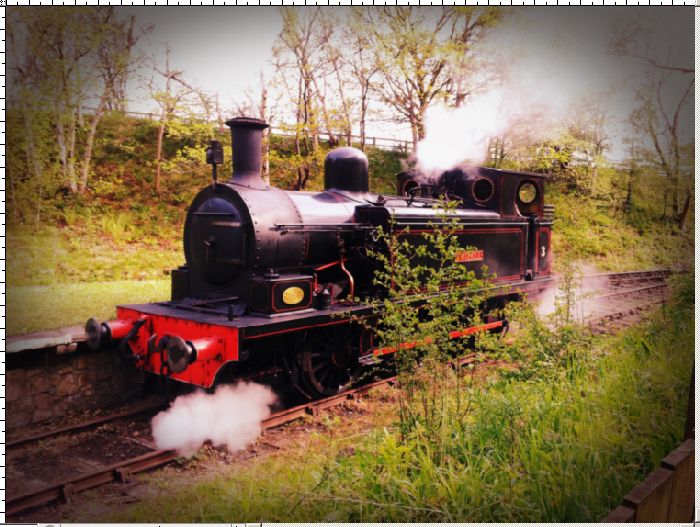
And that's it! Next week I'll post the alternative method as well.

Wednesday 1 May 2013

Lomo Photography

I've been keen on photography since I adopted my mother's Agfa Instamatic at the age of ten, and while I usually use digital (a Canon 400D, Canon Powershot A810 or my Samsung Galaxy S2 being preferred cameras), I've had a Pentax ME Super for a few years too. There's just something about the quality of the images that you can't achieve with digital, even using Photoshop.


I took this image of the fountain in Trafalgar Square, and managed to use a long enough exposure to give the water the milky texture so intrinsic to photos of water. Using ISO400 film meant that there was enough grain to give the image the sort of noise that you'd normally avoid in digital photography, but which works so well with film.


I took this image inside the Natural History Museum using Ilford's black and white film. Most film labs now process black and white film in colour fluid, which gives a reddish-brown tinge to black and white. I love monochrome photography anyway but this particular effect just seems so much richer than anything I could achieve in Photoshop.


I've been fascinated for a while by Lomo photography, which is the form of film photography which uses plastic 'toy' cameras, complete with defects such as light leaks, or strange colour effects. I took this shot at Woodhorn Colliery near Ashington and the fact it's slightly over exposed gives it a strange, eerie feel, while the overcast sky has a pinkish colour cast. I love the square frames of lomo photography, and it's amazing how simply clicking a button on a tiny camera gives me a more organic feel than anything I might throw together in Instagram.


I took this shot of the daffodils in our back garden, and it's obvious that I've quite monumentally screwed it up. I was shooting square frames but I wasn't advancing the film enough between shots, meaning I got this strange, ghostly effect as the centre portion is double exposed. The fact the film was exposed twice explains why it's brighter, as more light has been let in, and the image is slightly blurred as I had the camera on the wrong shutter speed, meaning I had too much motion in the camera at the point of exposure.

I think, in all honesty, that I prefer my Pentax as the picture quality is much better, and naturally the controls are more extensive - I have more than two shutter speeds, two apertures and four focal points to choose from. But at the same time, my Lomo is smaller, it doesn't require batteries, and there's something organic about the pictures that I want to experiment with further. Watch this space!